How to Set Up Your Camera for Wedding Sparkler Photos

💫 How to Set Up Your Camera and Take Sparkler Photos at a Wedding
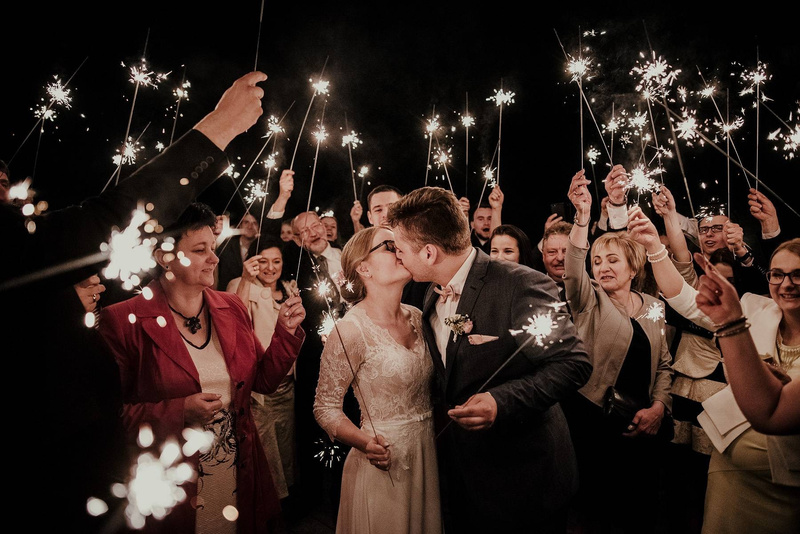
If you've ever dreamed of capturing that iconic wedding sparkler photo, this guide is for you! We'll walk you through how to prepare your camera, choose the right settings, and snap magical moments that sparkle with love.
🎇 Why Are Sparkler Photos So Popular?
Weddings are unforgettable events, and more couples are choosing pyrotechnic elements—like sparklers—to make their celebration visually spectacular. The shimmering lights create a romantic, dreamy effect that looks stunning in photos.
📸 Camera Settings for the Perfect Sparkler Shot
To make your sparkler photos stand out, use manual mode and adjust your settings:
Manual Mode (M): Gives you full control over your camera.
ISO: Start at ISO 800+ to capture more light—ideal for night shots.
Aperture: A wide aperture like f/2.8 helps create a shallow depth of field and lets in more light.
Shutter Speed: Try starting at 1/30s. A longer exposure captures light trails but may require stabilization.
White Balance: Use “Daylight” or “Auto.” You can also adjust this during post-processing.
Light Metering: Use spot or center-weighted metering to measure exposure accurately for the sparkler’s light.
👉 Tip: Lighting conditions vary—don’t be afraid to take test shots and tweak settings!
🎯 Why Manual Settings Matter
While Auto Mode is tempting, manual settings give you the power to fine-tune your image for drama and clarity. You'll capture more detail, emotion, and atmosphere.
📷 Choosing the Right Lens
Low Light Lens: Opt for a lens with a wide aperture like f/1.8 or f/2.8.
Focal Length: A longer focal length (e.g. 85mm) helps isolate the couple and blur out the background, making the sparklers pop.
🔧 Preparing Your Camera
Set your ISO and aperture before the event starts.
Check white balance and lighting conditions.
Decide if you’ll shoot in manual or auto mode—manual gives more creative control.
🌌 Perfecting Exposure
Balance aperture and shutter speed for optimal exposure. Longer shutter = more light trails, while a wider aperture = brighter images and a dreamier look.
Adjust exposure compensation if your shots are too dark or overexposed.
🖼️ Choose the Right Background
Sparkler photos shine brightest against darker backgrounds. Whether it's an outdoor scene or a dimly lit ballroom, make sure:
The couple is the focal point.
The backdrop enhances the light effects (not competes with them).
Props like lanterns or fog machines add to the visual story.
📷 Master the Technique
Stabilize: Use a tripod or rest your camera on a solid surface.
Focus: Lock focus on the couple—use center-point focus or back-button focus for better control.
Timing: Be ready to shoot at the perfect moment. Sparkler magic happens fast!
✅ Bonus Tips for Better Sparkler Photography
Talk with the couple: Understand their vision.
Experiment: Try different angles, zooms, and compositions.
Use extra light sources: Candles or lanterns can add warmth.
Get creative: Use panorama, night mode, or bokeh effects.
Coordinate with the DJ or planner: Timing is everything!
💍 Final Thoughts
Sparkler photos capture more than just light—they preserve emotion, magic, and love. By preparing your gear, mastering your technique, and working closely with the couple, you’ll create images they’ll treasure forever.
🎇 Explore our online store to find the perfect sparklers for your next event and create memories that sparkle for a lifetime!